ShopDreamUp AI ArtDreamUp
Deviation Actions


Suggested Deviants


Suggested Collections


You Might Like…


Featured in Groups

Description
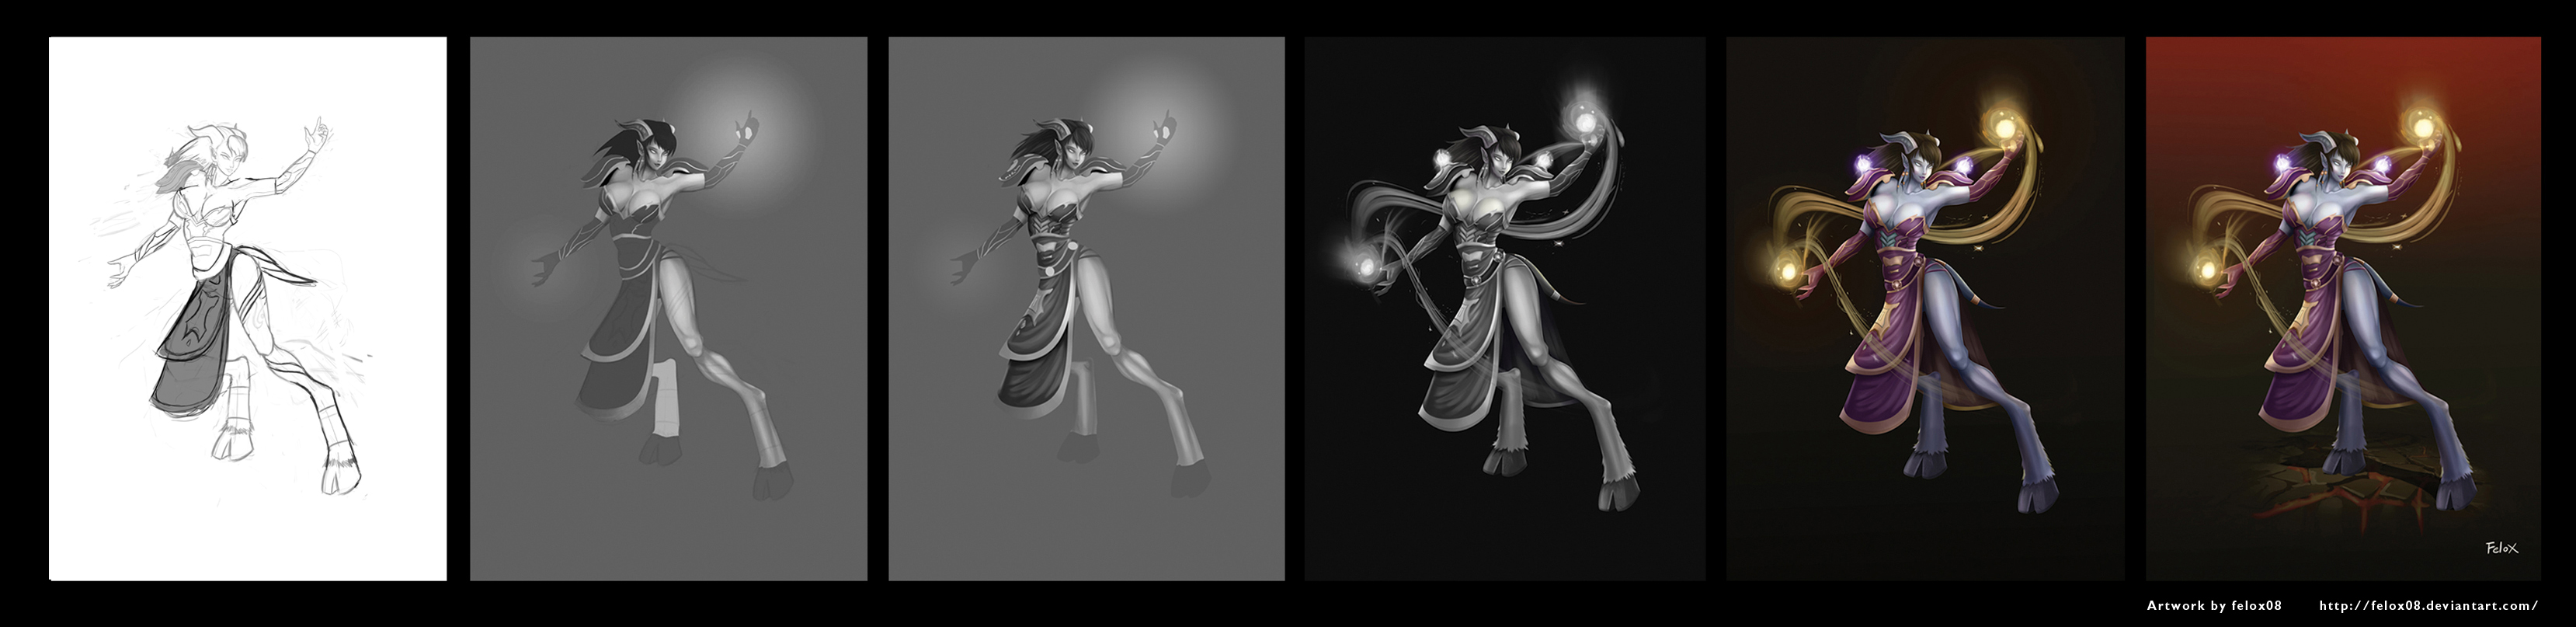
Process of :

-----------------
Im no expert on explaining things but i will do my beast sharining my thoughts during this process.
-In few words the process is this:
-Made in Photoshop Cs 5
1-Greyscale
2-Color
3-Lighting effects
--------------
Why is important to paint in greyscale?
-Because you dont lose time picking colors and if, by any chance you need to change you dont have to paint it again
1- Sketch: i never detail this part. is just to have a references while paiting. This layer goes on top with multiply blending mode
2- Greyscale mode: Define with diferent tones of gray the character parts (skin, outfit etc). Add some light spots where you think the light source is coming. Then start defining volumes of the character (you may have some real references on how to shade to get a realistic sensation of volume) .USe diferent kind of gray to achive this.
ALWAYS THINK 3D
3- Define even more the shading and the lighting with black and white tones. to give depth to the character
4-Work out the lighting sources (energy spheres in this case) going to 50% grey to white tone, using diferent blending modes such as overlay, color dodge, hard light. Erase some parts to give transparency to some parts of the elment. Give more contrast to the backround to get a more dramatic effect.
5- Adding color (change to rgb): Create a cripling mask over the layer you want to color (I use color mode for the character and linear light for the spheres).
COLOR MODE applies color over the shadows we paint before in the greyscale mode without losing any detail
Play with diferent blending modes and opacity
If you need more shadows create a multply layer above the color layer to give more depth and color to the shadows.
You can use the Dodge tool to give lighting to the character and some particular areas.
6- Pick suitable colors to achieve good contrast between the charactert and the backround.
Finally , adjust colors using the colo balance and Bright contrast tools on the spots you think may need changes
Image size
3317x807px 848.06 KB
© 2012 - 2024 Felox08
Comments8
Join the community to add your comment. Already a deviant? Log In
Great picture and nice step by step process, thank you for that  (Smile)")